Overview
INSTALLING THE LINUX KERNEL
Installing the Linux kernel is done using Git. The following command will download the Linux kernel that is supplied by Intel.
cd
git clone https://github.com/altera-opensource/linux-socfpga.git
cd linux-socfpga

# We will check out the most recent release of the kernel
# with changes specific to the SoC.
git checkout rel_socfpga-4.16_18.06.01_pr
When this completes, you should see a new directory that contains the source code for the Linux kernel.
Validate Build Environment
Before we compile the kernel, be sure that your Linux environment variables are set up correctly. The target architecture should be set to arm and the CROSS_COMPILE needs to be set.
If you have not completed this step, please see the following post that instructs you on how to set up your build environment.
Configuring the Linux Kernel
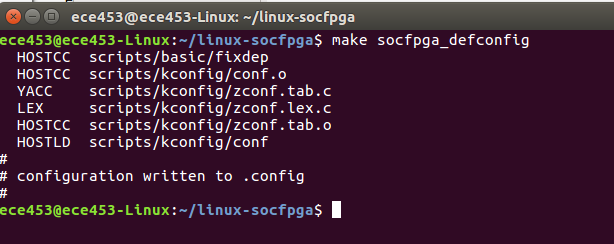
Now that we have the Linux kernel downloaded, we need to configure the Linux kernel. We start the process by telling the kernel that we are building for the SoC.
cd linx-socfpga
make socfpga_defconfig
Now we will add some additional software support in the Linux Kernel
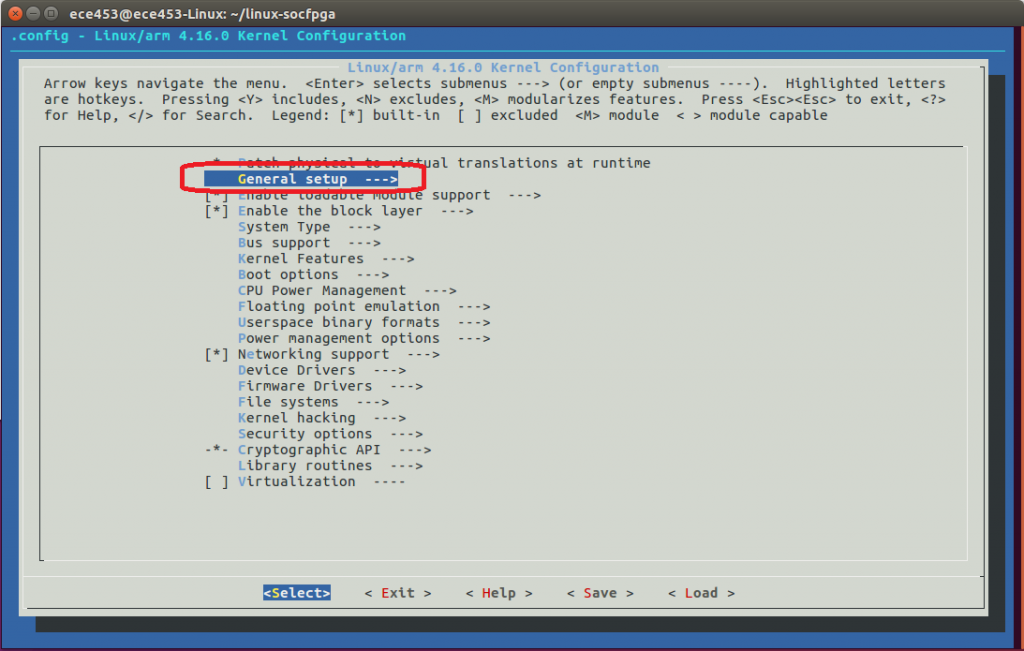
make menuconfig
From the window that is opened, select General setup.
Arrow down until you have highlighted Automatically append version information to the version string. Press the space bar to un-select this option. This will allow us freedom to insert kernel modules that were not compiled for this specific kernel version.
Hit ESC. Now go to Enable the block layer. Press enter. Then go to Support for large (2TB+) block devices and file. Press Enter to select this.
Adding SPI Support
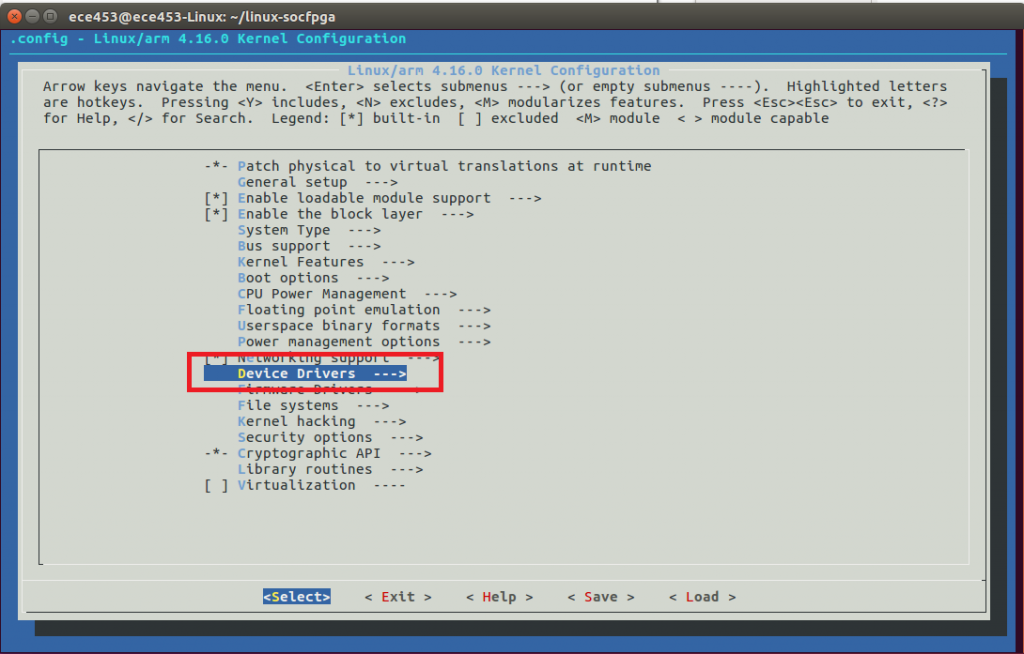
Hit ESC. Now go to Device Drivers.
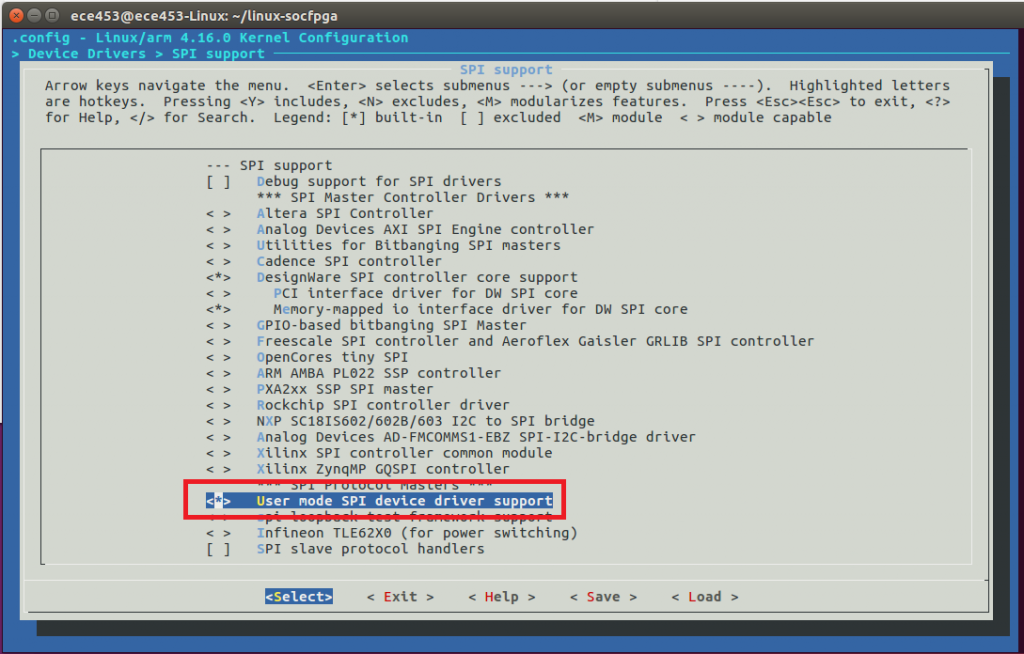
Arrow down until you have selected SPI Support. Then press enter.
Verify that User Mode SPI device driver support has been selected.
Adding VGA Support
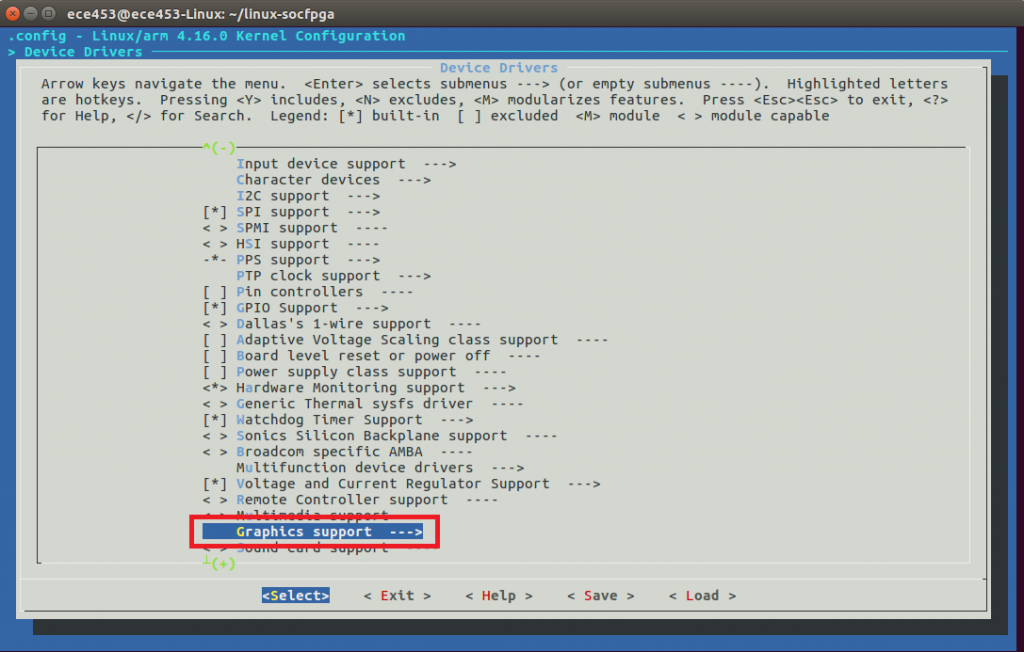
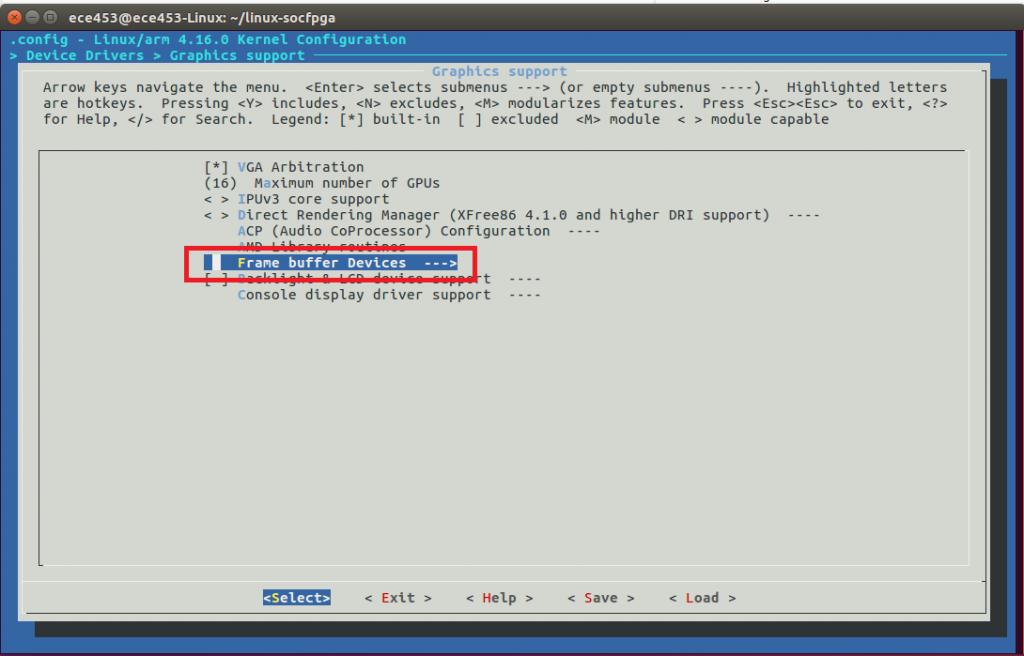
Press ESC until you are at the top most menu. We will now turn on the device drivers for frame buffer based graphics. This will allow you to use the VGA port on the DE1-SoC.
Device Drivers  --->
  Graphics support  --->
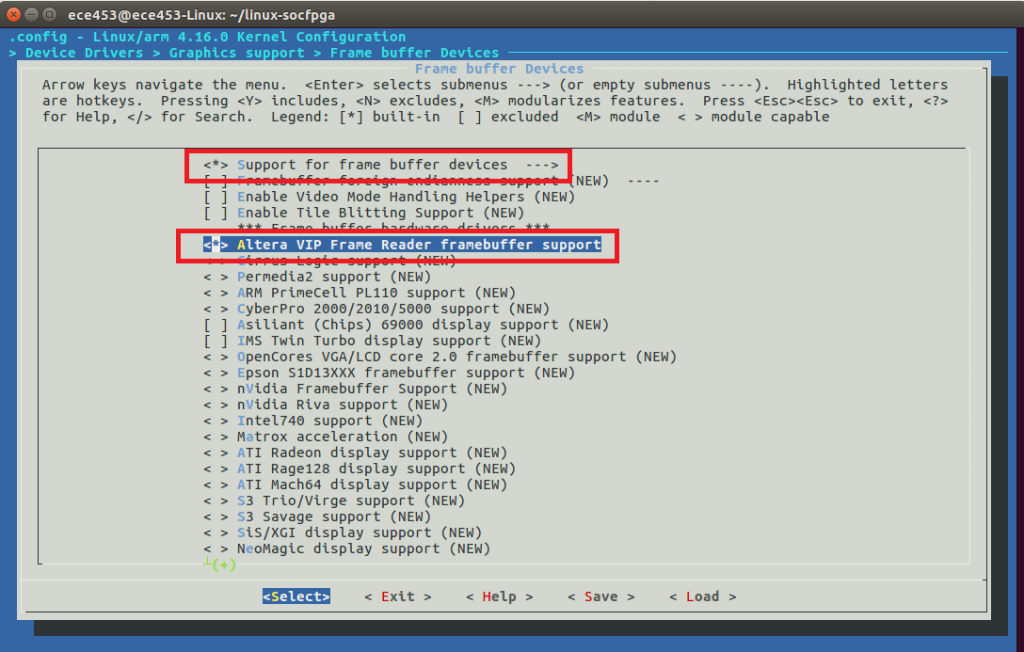
    Frame buffer Devices  --->
      <*> Support for frame buffer devices  --->
      <*> Altera VIP Frame Reader framebuffer support
Be sure that you have selected both options. Each option MUST have a “*” next to it
Press ESC until you are at the top level again.
Adding Multimedia Support
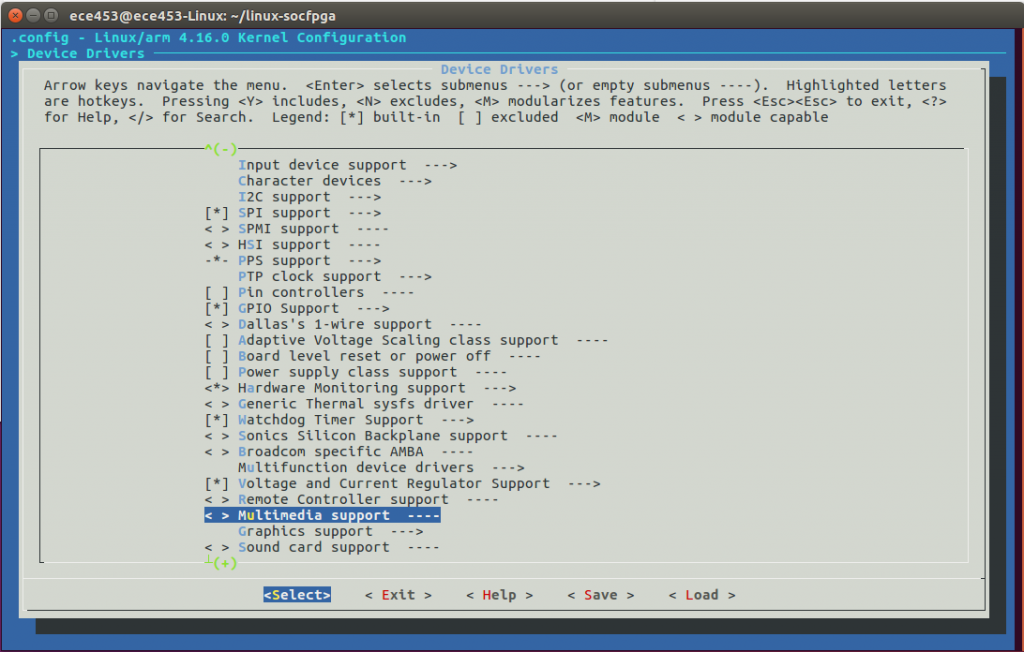
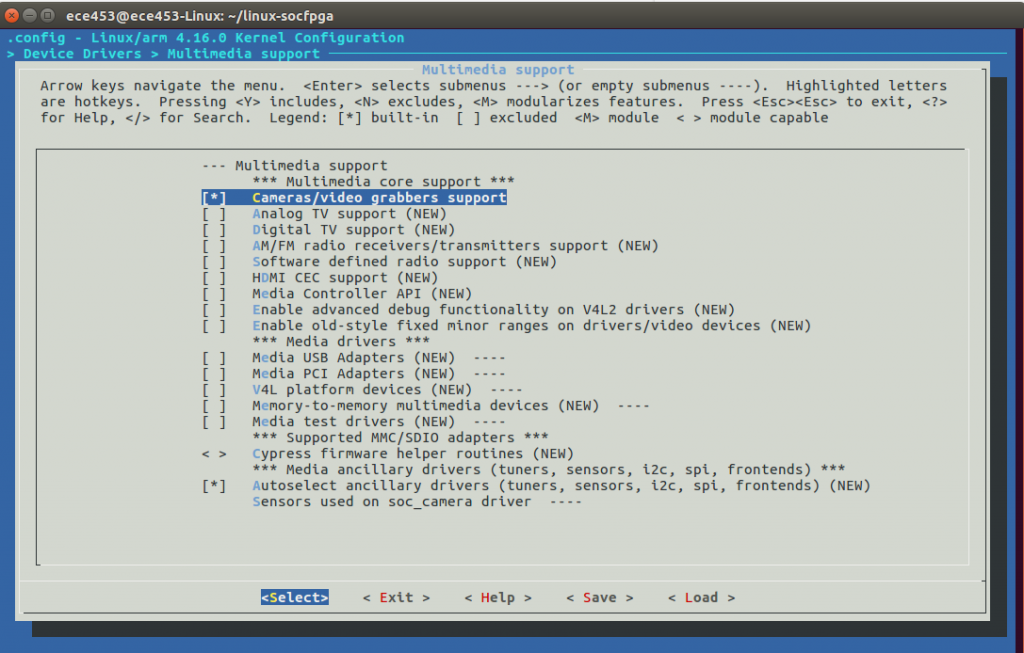
Now we will turn on USB based camera support.
Device driver-->
  <*>Multimedia support-->
    [*]Cameras/video grabbers support
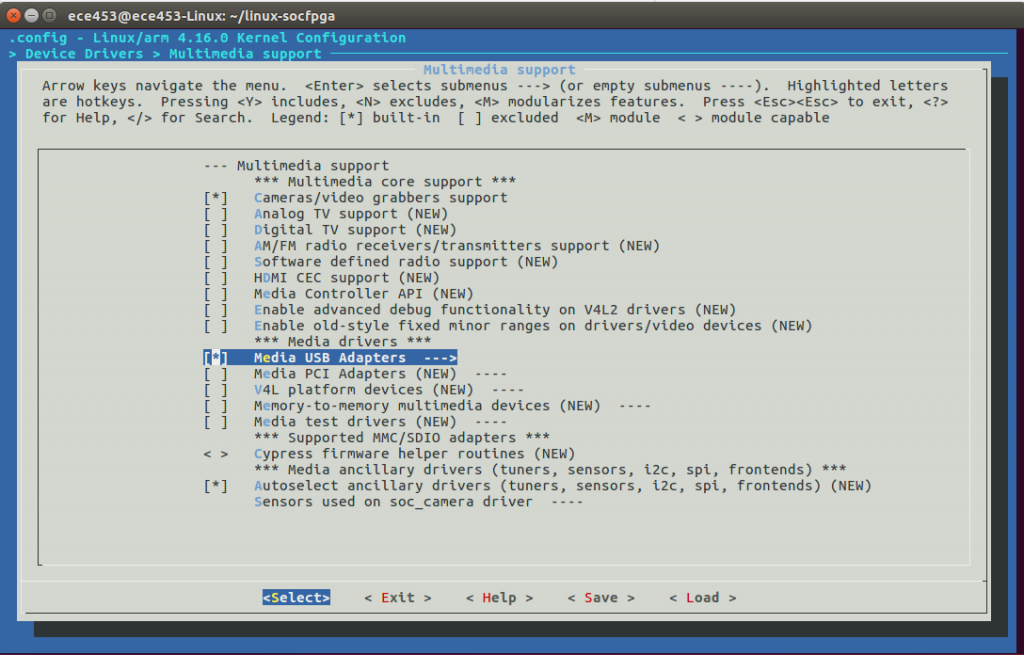
    [*]Media USB Adapters-->
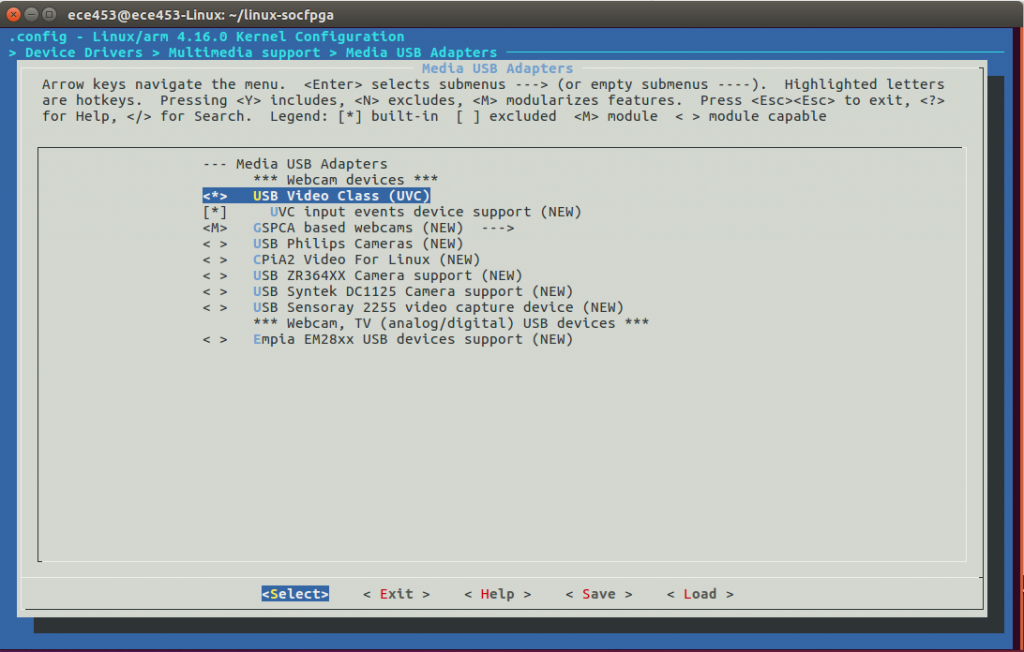
      <*>USB Video Class(UVC)
        [*]UVC input event device support
Also, be sure to select Media USB Adapters.
After selecting Media USB Adapters, press ENTER and select USB Video Class.
Now Press ESC until menuconfig asks you to save the configuration. Confirm that you are going to save the configuration.
Compiling the Kernel
You can compile the kernel using the following command
make zImage -j4
The resulting kernel image can be found here : ~/linux-socfpga/arch/arm/boot/zImage
Copy the Kernel Image to the Bootable SD Card
The zImage can be copied to the 1st partition on the SD card.
cd ~/linux-socfpga
cp arch/arm/boot/zImage /media/ece453/SOC/zImage


